
Cloudflare 的 cloudflare-create CLI(簡稱 C3)提供了許多前端框架的 templates 讓開發者們可以快速建立前端專案,包含 Next.js, Nuxt, React, Vue, Angular, SvelteKit 等等,可以參考官方文件,裡面有所有支援的框架。
1. 用 C3 初始化專案
執行以下指令:
$ pnpm create cloudflare@latestc3 就會開始引導你如何建立新專案,這篇文章會以 React 搭配 TypeScript + SWC 為例:
Create an application with Cloudflare Step 1 of 3
│
├ In which directory do you want to create your application?
│ dir ./cloudflare-c3-with-react
│
├ What would you like to start with?
│ category Framework Starter
│
├ Which development framework do you want to use?
│ framework React
│
├ Select a variant:
│ variant TypeScript + SWC
│
├ Continue with React via `pnpm dlx [email protected] cloudflare-c3-with-react --template react-swc-ts`
│
初始化專案後,cd 到專案裡面可以看到,連 npm install 都幫你執行好了。
2. 部署專案到 Cloudflare Pages
Cloudflare Pages 是建立在 cloudflare workers 的部署平台,部署到 Cloudflare Pages 有什麼好處呢?光是免費方案就已經有以下規格:
Unlimited sitesUnlimited requestsUnlimited bandwidth基本上看到這三點就覺得超誇張了,每次看到 Cloudflare 推出新產品都會想:他們到底要靠什麼賺錢…
目前有幾種方式可以部署到 Cloudflare Pages:
2.1 Direct Upload
Direct upload - 你可以直接將 build 好的靜態檔案透過以下方式部署到 Cloudflare Pages:
注意:Direct Upload 之後就不能和 git 做整合,如果要和 git 做整合就只能再開一個新的專案。有兩種方式可以 direct upload: wrangler 以及在 Cloudflare Pages 的 dashboard 上做上傳。
- 使用 wrangler
打開 package.json 的話,可以觀察到
"scripts": {
  "deploy": "pnpm run build && wrangler pages deploy ./dist"
},
deploy 的指令除了會執行 vite build 之外,後面還多了 wrangler pages deploy ./dist。
wrangler 是用來執行 cloudflare workers 相關的 CLI 工具,而 pages 則是建立在 cloudflare workers 的部署平台,因此這行指令的意思是,把 build 好的靜態檔案(./dist 裡面的所有檔案)透過 wrangler,deploy 到 Cloudflare Pages 上。
執行以下指令:
$ pnpm run deploy接著 wrangler 會引導你在 cloudflare 上建立新的 Cloudflare Pages 專案,建立完專案後會直接把 ./dist 裡面的所有檔案上傳到新建立的 Cloudflare Pages 專案。
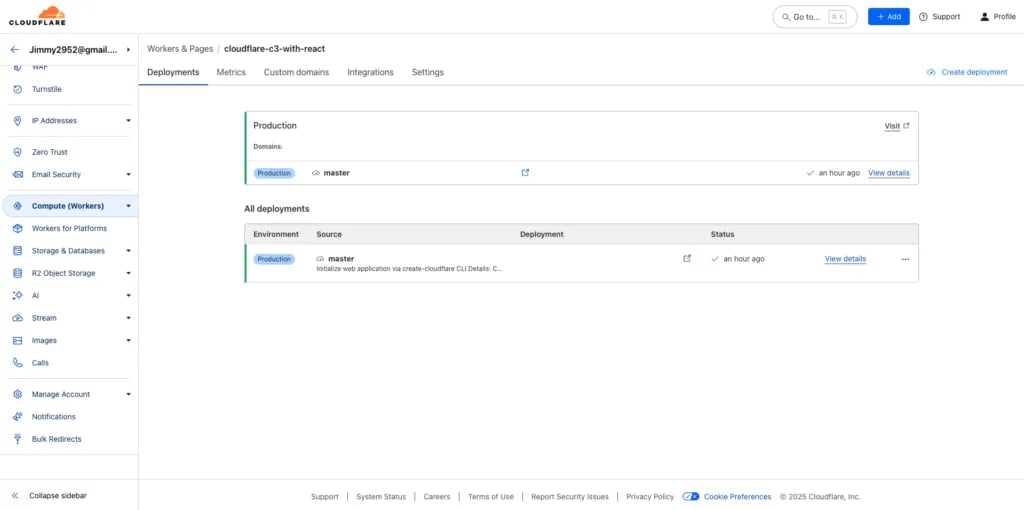
進到 Cloudflare 的 dashboard 後,點擊 sidebar 的 Compute (Workers),就會看到剛剛透過 wrangler 建立的 Cloudflare Pages 專案。
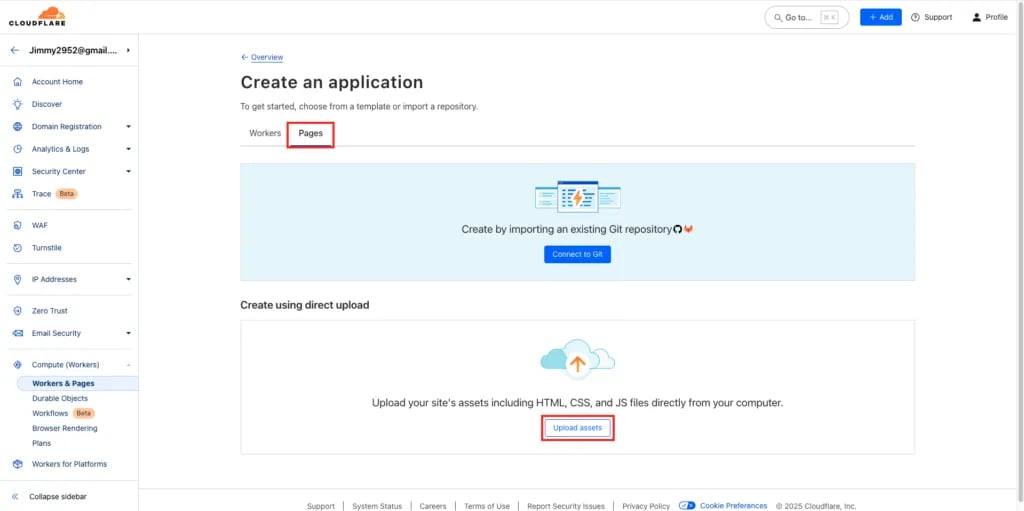
- 直接上傳檔案到 Cloudflare Pages 的 Dashboard 上
進到 Cloudflare 的 dashboard 後,點擊 sidebar 的 Compute (Workers) 後,點擊 Pages 後,再點擊 Upload assets,之後輸入這個 Cloudflare Pages 的專案名稱,再將 build 好的靜態檔案上傳上去就可以了。
2.2 整合 git
如果希望和 git 的專案做整合的話,就不能選擇 direct upload 的方法。
如果要和 git 的專案整合,首先需要將剛剛在 local 建立的專案 push 到 remote 建立的專案上,這邊以 github 為例。
延伸閱讀:如何用git 將資料夾加入到版本控管中?
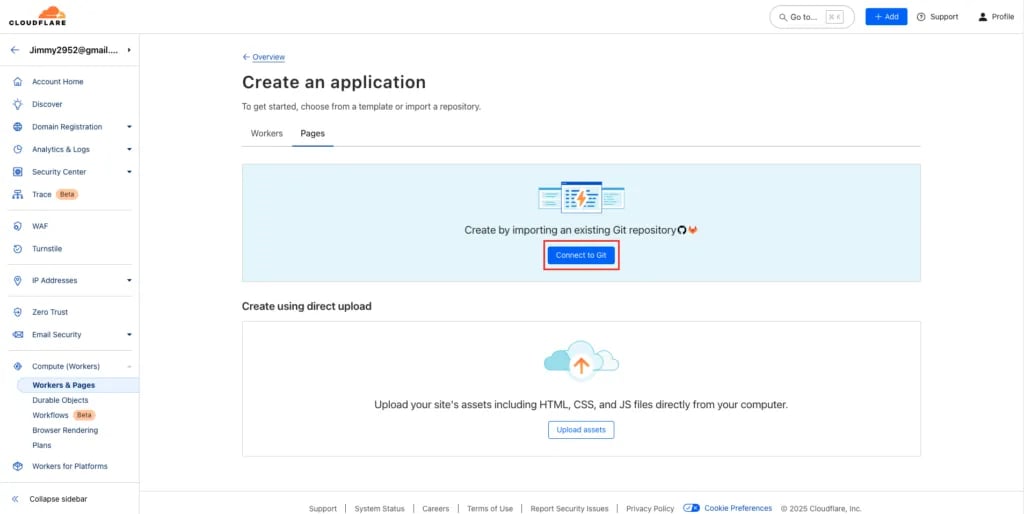
首先進到剛剛 Create an application 的頁面,然後點擊 Connect to Git
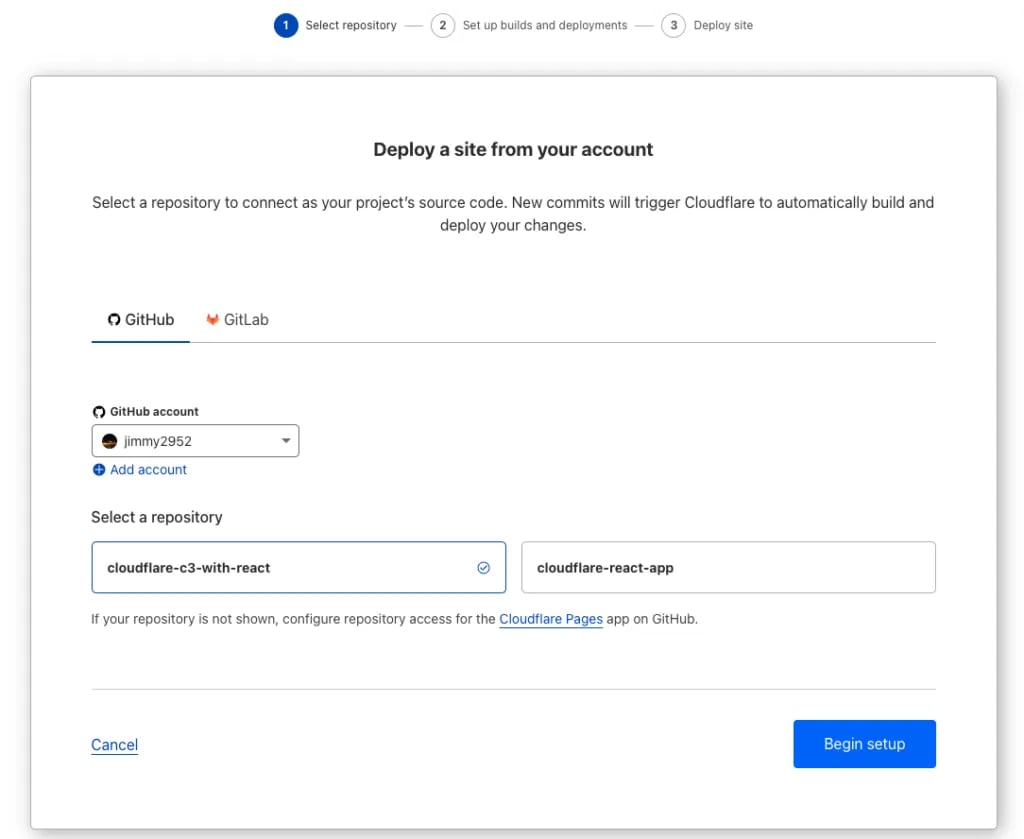
接著選擇你要整合的 repo(如果是第一次進來應該還會有 github 授權相關的流程,這裡可以選擇只授權即將整合的專案)
接著輸入這個 Project 在 Cloudflare Pages 上的名稱以及 Production branch,之後只要有 commit push 到這個 branch,Cloudflare Pages 就會自動幫你 deploy(之後也可以在 dashboard 把這個 automatic deployments 關掉)
然後要選擇目前專案的框架以及 build command,通常選了框架後就會自動帶入預設的 command 和 build 好的檔案會放到哪個 directory,如果要客製化的話再輸入自定義的 command 和位置就好。
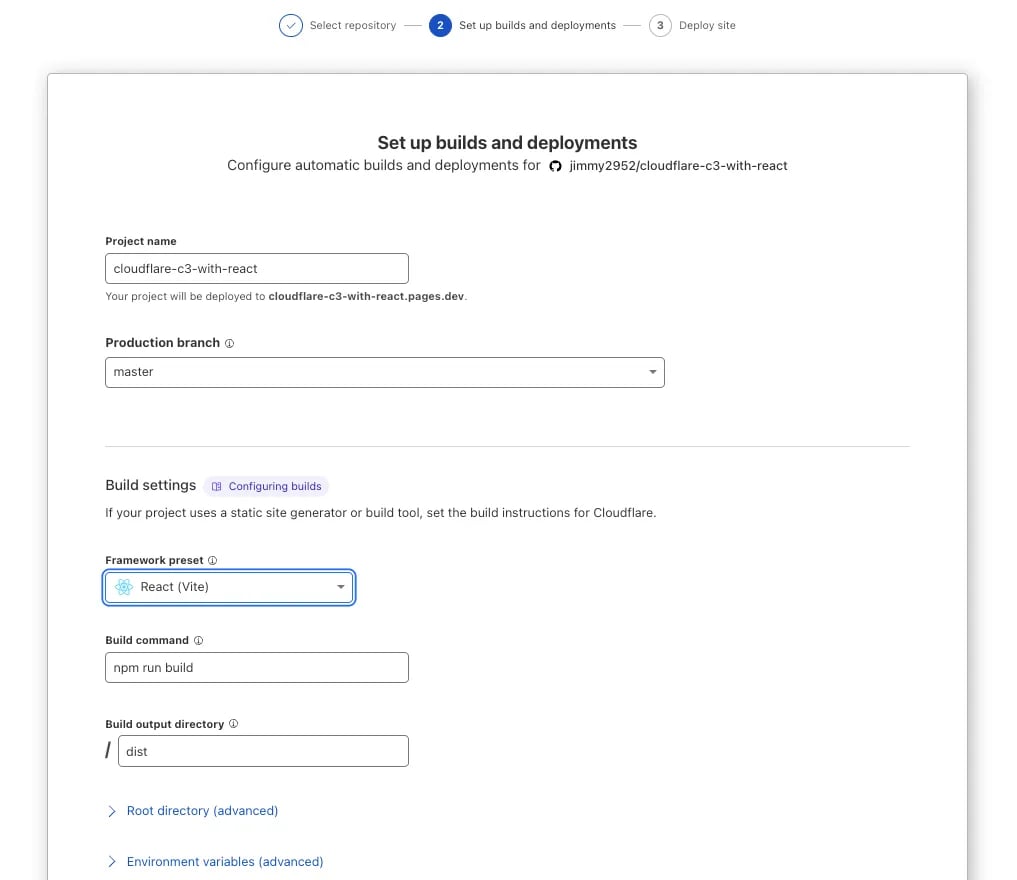
按下 Save and Deploy 後,Cloudflare Pages 就會自動幫你 build 並且 deploy 這個專案。
Deploy 後會出現成功的畫面,點擊 preview 的 url 就可以看到 build 好的 app 了!
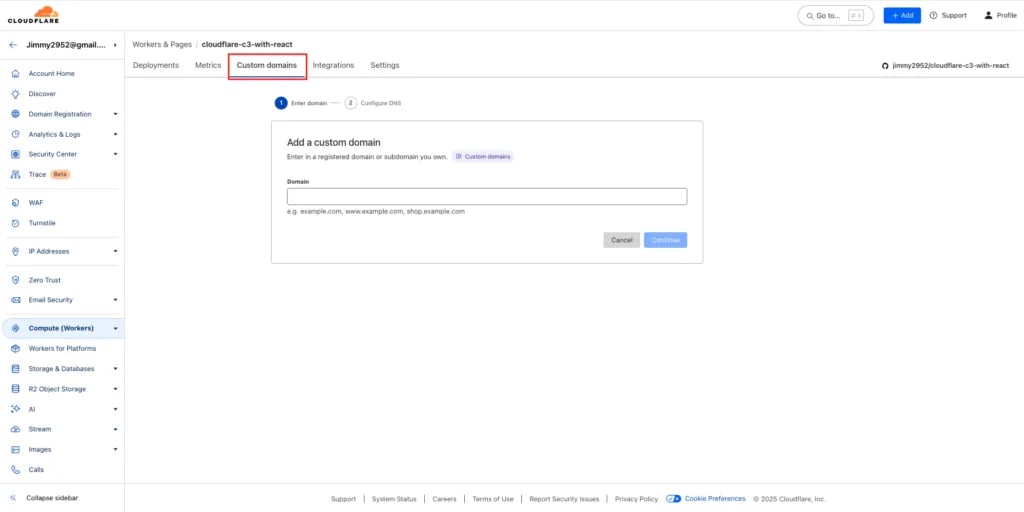
3. Custom Domain
Cloudflare Pages 還可以設定 custom domain,進到專案的頁面後點擊 Custom domains 的 tab 後,輸入自己擁有的某個 domain,再設定 DNS,之後就可以把 domain 綁到目前建立的 Cloudflare Pages 專案上囉!
4. 結論
最近很多前端架構的服務都建立在 Cloudflare 相關的服務上,一方面完全免費,另一方面是提供了很多其他 cloud service 沒有的 solution,而這篇介紹的 solution 是我目前覺得最方便也最快速可以從頭建立前端專案的 solution,如果沒意外的話之後自己的小專案應該都會用 cloudflare 來處理,希望這篇文章有幫助到想建立前端專案的開發者們 🥳
5. Reference
Create projects with C3 CLI
C3 & Wrangler - Learning Paths
Cloudflare Pages
Workers & Pages Pricing