Table of Contents
1. 建立 TypeScript 專案
要 debug 的話首先當然要先有檔案,建立 TypeScript 的專案流程可以參考:【 Node.js 】如何在 Node.js 中建立 TypeScript 的環境。
2. 新增 tsconfig.json 設定檔
在建立專案時有一個步驟是用 tsc –init 指令新增 tsconfig.json 設定檔,該設定檔是用來讓 tsc 決定要用哪些設定來把 TypeScript 編譯成 JavaScript ,在終端機輸入 tsc –init 指令後,以下會是預設的設定 ( 把 comment 刪除後 ):
// tsconfig.json
{
  "compilerOptions": {
    "target": "es5",
    "module": "commonjs",
    "strict": true,
    "esModuleInterop": true,
    "skipLibCheck": true,
    "forceConsistentCasingInFileNames": true
  }
}
把設定檔修正為以下,才能在 Node.js 裡用 import 來引入模組,關於 Node.js 的模組歷史可以參考:webpack 新手教學之淺談模組化與 snowpack。
// tsconfig.json
{
  "compilerOptions": {
    "target": "es2020",
    "lib": ["es2020"],
    "module": "commonjs",
    "moduleResolution": "node",

    "strict": true,
    "esModuleInterop": true,
    "skipLibCheck": true,
    "forceConsistentCasingInFileNames": true,
    "outDir": "dist",
    "sourceMap": true
  }
}
3. 新增 vscode 的 debug 設定檔 ⏤ launch.json
接著就要來新增 vscode 的 debug 設定檔,才能開始 debug。
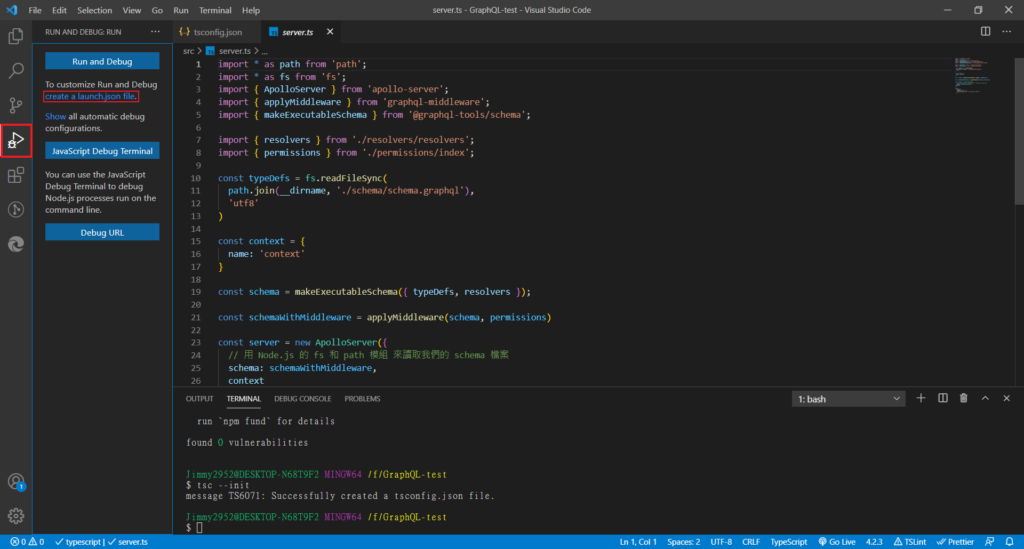
首先點選旁邊的 debug icon,點下去後再點擊 create a launch.json file. ,來產生設定檔:

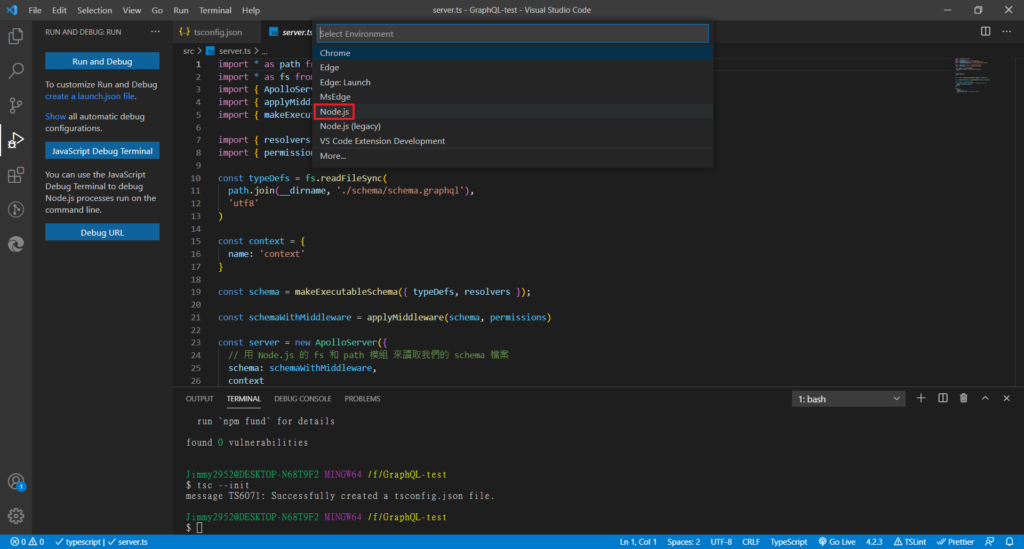
點下去後會出現一些選項可以選擇,如果是要在後端 debug ,請選擇 Node.js:

點擊完後 vscode 就會自動產生一個 debug 的設定檔,裡面有個 preLaunchTask ,代表每次 debug 前會先執行這行指令,也就是用 tsc 把 TypeScript 編譯為 JavaScript,這邊不用做其他修改:
{
  // Use IntelliSense to learn about possible attributes.
  // Hover to view descriptions of existing attributes.
  // For more information, visit: https://go.microsoft.com/fwlink/?linkid=830387
  "version": "0.2.0",
  "configurations": [
    {
      "type": "pwa-node",
      "request": "launch",
      "name": "Launch Program",
      "skipFiles": [
        "<node_internals>/**"
      ],
      "program": "${workspaceFolder}/src/server.ts",
      "preLaunchTask": "tsc: build - tsconfig.json",
      "outFiles": [
        "${workspaceFolder}/dist/**/*.js"
      ]
    }
  ]
}
4. 開始 debug
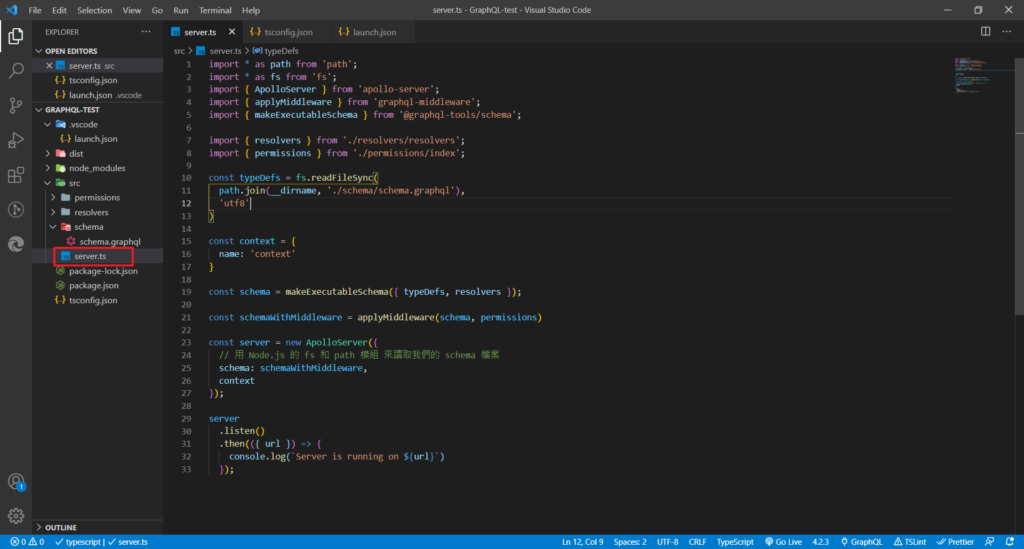
新增完設定檔後就可以準備開始 debug 了,但在 debug 前,要先點擊該專案的進入點檔案:

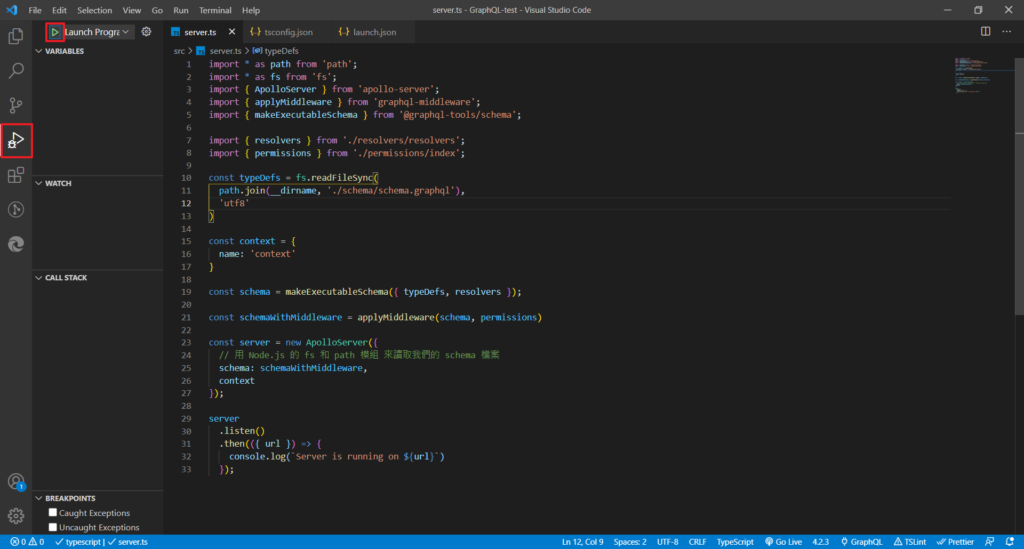
接著再點擊左邊的 debug icon,這時候會發現和剛剛沒有設定檔前的頁面不同,可以開始 debug 了:

點擊 play 的 icon ,vscode 就會進入 debug mode 了。
如果覺得我的文章有幫助的話,歡迎幫我的粉專按讚哦~謝謝你!
